
Fotografie

Licht, Farbe und Form in der Landschaft
Bildgestaltung und ein frischer Blick auf die Landschaftsfotografie.Erleben Sie die Landschaftsfotografie auf andere Art. Zwar werden in der Einleitung typische Themen wie die Wahl der Ausrüstung und Aspekte der Bildkomposition angesprochen, der größte Teil des Buches basiert allerdings auf der Entstehungsgeschichte ausgewählter Bilder von Carsten Krieger. Detaillierte Hintergrundinformationen beschreiben zu jedem Foto sowohl den technischen als auch kreativen Weg von der Idee zum fertigen Bild und vermitteln so das nötige Wissen, um zu eigenen Bildkompositionen zu gelangen.Der Autor folgt mit »Licht, Farbe und Form in der Landschaft« einer ganz eigenen Systematik der Landschaftsfotografie und teilt das Buch in die folgenden Motivwelten:Grenzgebiete – Landschaften an Übergangen und Scheidelinien, bspw. von Land zu Wasser oder von Tag zu NachtLabyrinthe – Ordnung in »Wimmelbildern« finden und herausarbeitenKleine Landschaften – Natur aus der Halbtotalen fotografiertFarben und Formen im Nah- und Makrobereich komponierenDer Faktor Mensch – die Spuren menschlichen Wirkens in Bilder einbeziehenMagisches Schwarzweiß – Reduktion auf Licht und Schatten

Nikon Z 5
Das Handbuch zu Nikons Vollformat-Bestseller* Umfassende Einführung in alle Menüpunkte und Erklärung aller Bedienelemente* Handfeste Praxistipps für den perfekten Umgang mit der Z 5* Motivideen, Zubehör-Empfehlungen und Objektiv-Tipps für bessere BilderNikon wendet sich mit der Z 5 auch und gerade an Ein- und Umsteiger ins noch recht junge spiegellose Vollformatsystem der Z-Serie. Jede Menge professionelle Funktionen der "großen Schwestern" Z 6 und Z 7 sind auch beim Einstiegsmodell Z 5 mit an Bord, da heißt es für den Benutzer: nicht den Überblick verlieren. Genau hier setzt das Handbuch zur Nikon Z 5 an.In einem detaillierten Einstiegskapitel lernen Sie sämtliche Funktionen und Menüpunkte kennen und werden mit der opulenten Ausstattung im Detail vertraut gemacht. In verständlicher Sprache und immer mit maximalem Bezug zur Praxis erläutert Frank Späth, worauf es bei der Programmierung und dem Einsatz der Z 5 ankommt, welche Features wichtig sind und auf welche Sie eher verzichten können.Im reichlich bebilderten Praxisteil geht es dann um die fotografischen Kernthemen rund um Autofokus, Farbe, Empfindlichkeit, Blitzen, Bildqualität und um die Videofeatures der Nikon. Lernen Sie grundlegende Fehler zu vermeiden und erfahren Sie, wie Sie das professionelle Angebot Ihrer Nikon spielend in packende Bilder und Filme umsetzen. Leicht verdauliche Motiv-Workshops zu wichtigen Motivgebieten wie Porträt, Sport, Natur, Landschaft oder Architektur lockern das Handbuch zur Z 5 auf.Wer noch vor der Kaufentscheidung steht, profitiert ebenfalls vom Wissen und der Erfahrung des Autors, der während der kompletten Buchproduktion parallel mit einer Nikon Z 6 gearbeitet hat und an passenden Stellen Unterschiede zwischen beiden Modellen herausarbeitet.Frank Späth arbeitet seit 1995 in der Fotozeitschriftenbranche und schreibt seit über 20 Jahren Kamera-Handbücher. Das Nikon-Z-System hat den Chefredakteur der PHOTOGRAPHIE schon beim globalen Launch 2018 begeistert, als Späth in Tokio als einer der ersten Fachjournalisten weltweit Nikons spiegelloses Vollformat testen durfte. "Mit der Z 5 bringt Nikon die professionelle Ausstattung der deutlich teureren Schwestermodelle ohne nennenswerte Abstriche auf ein für Amateure und Einsteiger in die Welt der Fotografie mit großen Sensoren erschwingliches Niveau", so der Autor.

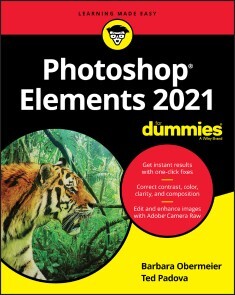
Photoshop Elements 2021
Photoshop Elements 2021 - Das umfangreiche Praxisbuch- Aufnahmen perfekt bearbeiten sowie kreative Kompositionen zaubern - Collagen, Alben, Diashows u. v. m. erstellen und präsentieren- Mit Beispielbildern zum kostenlosen DownloadPhotoshop Elements 2021 ist das optimale Werkzeug zur kreativen Bildbearbeitung. Mithilfe dieses Handbuchs lernen Sie die Vielzahl an fantastischen Funktionen und Möglichkeiten des Programms von Grund auf kennen und mit Freude beherrschen!Erfahren Sie, wie Sie Ihre Fotos mit Smart-Tags im Organizer verwalten und die volle Übersicht behalten. Detaillierte Anleitungen zeigen, wie Sie Ihre Aufnahmen optimieren, retuschieren und besondere Effekte anwenden. Sie werden Schritt für Schritt routiniert im Umgang mit Ebenen und Masken und können schon bald künstlerische Montagen sowie individuelle Kompositionen selbst erstellen. Setzen Sie die künstliche Intelligenz des Programms gezielt ein, freuen Sie sich über einzigartige Fotoergebnisse und präsentieren Sie diese in Alben, Diashows, Collagen und im Internet. Gut nachvollziehbare Beispiele und praktische Tipps der Profis bringen Ihnen das gesamte Know-how zu Photoshop Elements 2021 näher. Mit Bildern zum Gratis-Download können Sie das Gelernte gleich ausprobieren. Aus dem Inhalt:- Was ist neu in Elements 2021?- Neue Skills direkt erlernen mit 58 How-tos- Die künstliche Intelligenz effektiv nutzen- So bringen Sie Bewegung in statische Bilder- Automatische Korrekturen durchführen - Aufnahmen schnell und kreativ bearbeiten - Farben optimieren, Fotos per Klick färben- Helligkeit und Kontrast korrigieren- Fotos nachschärfen und weichzeichnen- Retuschen und Schönheitskorrekturen- Gestalten mit Filtern, Stilen und Effekten- Mit Ebenen und Masken arbeiten- Montagen aus mehreren Aufnahmen - Künstlerische Überlagerungseffekte- Wie die Rauschreduzierung funktioniert- Objekte entfernen – Hintergrund ersetzen- Gesichtserkennung und Personen-Tags- Die Neigung von Gesichtern korrigieren- Von Haut glätten bis Augen öffnen- Bilder mit dem Musterpinsel verzieren- Ihre Fotos in Memes verwandeln- Workflow der RAW-Entwicklung- Bilder mit dem Organizer verwalten- Speichern, konvertieren und im Editor öffnen- Aufnahmen in Alben sammeln und finden- Grußkarten, Fotocollagen & Co.- Animierte Zitatgrafiken für Social Media gestalten und Kreationen teilen Hinweis: Die Nutzung der Beispielbilder ist ausschließlich für Käufer dieses Buches, und nur für Lern- und Übungszwecke erlaubt. Die anderweitige Nutzung, Weitergabe oder das in Umlauf bringen ausdrücklich untersagt.

Flow - Fotografieren als Glückserlebnis
WIE SIE IHRE KREATIVITÄT FREISETZEN UND BESSERE FOTOS IM FLOW GELINGEN! * Den psychologischen Prozess des Flow verstehen * Wie Sie den Flow beim Fotografieren nutzen * Konzeptionell fotografieren und Bilder stimmungsvoll gestalten Jeder hat schon einen "Flow" erlebt – beim Musizieren, beim Sport, beim Lösen einer komplizierten Aufgabe, beim kreativen Schreiben oder auch beim Fotografieren. Man ist konzentriert und vergisst die Welt um sich herum, und plötzlich erzielt man ein unerwartet gelungenes Ergebnis, das sich rund anfühlt. Dieses Erfolgserlebnis wiederum steigert die Begeisterung, sodass man sich schon bald in einer Glücksspirale wiederfindet. Dieser hocheffiziente mentale Zustand funktioniert auch hervorragend in der Fotografie. Zunächst erklärt die Autorin, selbst Wissenschaftlerin und immer auf der Suche nach dem neuesten Stand der Forschung, was Flow ist und welche psychologischen Prozesse sich dahinter verbergen. Anschließend zeigt sie, wie Sie diesen Zustand gezielt erreichen. Sie gibt eine Anleitung, wie Sie ihn wiederholt reproduzieren können. Im zentralen Teil des Buchs wendet Pia Parolin, das Flow-Erlebnis auf das Fotografieren an. Die erfahrene Fotografin demonstriert, wie der Flow gezielt für kreativere Bildergebnisse eingesetzt werden kann. Wie gelangen Sie mithilfe des Flows zu einer stimmigeren, harmonischen Gestaltung Ihrer Bilder? Wie können Sie neue Fotoprojekte konzipieren und optimieren? Die Autorin zeigt Ihnen, wie wie Sie Ihren eigenen Weg finden und den Flow für bessere fotografische Leistungen und mehr Spaß an der Kreativität anwenden können.

Das Fotobuch
Geben Sie Ihren Bildern den Auftritt, den sie verdienen: in einem hochwertig gestalteten Fotobuch! Es gibt viele Anbieter, noch mehr Produktmerkmale und viele Entscheidungen auf dem Weg zu einem gelungenen Fotobuch. Nina und Eib Eibelshäuser begleiten Sie bei jedem Schritt: von der Planung eines Fotobuches über die Bildbeurteilung und -auswahl bis zur praktischen Fotobuchgestaltung. Dabei ist das Buch immer unabhängig; es widmet sich den entscheidenden konzeptionellen und gestalterischen Fragen, die sich mit unterschiedlicher Software und unterschiedlichen Anbietern beantworten lassen. So, wie es zu Ihnen und Ihren Bildern passt. Aus dem Inhalt: Das Fotobuch: Archiv, Bühne und ArbeitsmittelEine Geschichte erzählenDie Fotos: unverzichtbarer StoffProduktmerkmale eines FotobuchesBilder bewusst beurteilen und auswählenWas ist eigentlich ein Layout?Format, Satzspiegel und RasterBilder: Positiion und HierarchieBuchumschlagTypografieDramaturgieLessons Learned Einführung. Das Fotobuch -- Archiv, Bühne und Arbeitsmittel ... 10 Willkommen in Ihrem Workshop! ... 11 Ein Fotobuch bleibt ... 12 Vom Fotoalbum zum Fotobuch ... 13 Gedankliche Schritte auf dem Weg zum Fotobuch ... 15 Das Fotobuch als Fotoalbum 2.0? ... 22 Jetzt mit Elan loslegen ... 22 TEIL I VORÜBERLEGUNGEN UND PLANUNG ... 25 Kapitel 1. Eine Geschichte erzählen ... 26 1.1 ... Was möchte ich erzählen? ... 27 1.2 ... Wem möchte ich die Geschichte erzählen? ... 32 1.3 ... Soll das Buch nur für mich sein? ... 33 1.4 ... Brauche ich eine Zielgruppe für meine Geschichte? ... 36 1.5 ... Möchte ich das Buch verkaufen? ... 37 1.6 ... Welche Art von Fotos? ... 39 1.7 ... Wie muss ich diese Fotos aufbereiten? ... 41 1.8 ... Nur Fotos zeigen? ... 42 1.9 ... Farbe oder Schwarzweiß? ... 44 1.10 ... Nicht nur Geschichten ... 45 1.11 ... Fotos können nicht nur Fotobuch ... 50 LESSONS LEARNED ... 51 Kapitel 2. Die Fotos -- unverzichtbarer Stoff ... 52 2.1 ... Fotos werden interpretiert ... 52 2.2 ... Erst gedruckt hat das Foto eine Bühne ... 57 2.3 ... Mit dem Archiv arbeiten ... 59 2.4 ... Der Umgang mit analogen Fotos ... 60 EXKURS: Lars Heidemann zum Hybrid-Workflow ... 62 2.5 ... Nur für das Buch erstellte Fotos verwenden? ... 66 2.6 ... Altes und Neues zusammen? ... 66 2.7 ... Fotografieren Sie für Layoutstrukturen ... 67 2.8 ... Untergliedern Sie Ihren Eigenauftrag ... 69 2.9 ... Sammel- und Sortierarbeit ... 71 LESSONS LEARNED ... 75 Kapitel 3. Produktmerkmale eines Fotobuches ... 76 3.1 ... Text, Farbe und weitere Elemente ... 76 3.2 ... Druckformate ... 84 3.3 ... Papiere ... 89 3.4 ... Bindung und Umschlag ... 95 3.5 ... Fotobuchanbieter im Vergleich ... 102 LESSONS LEARNED ... 107 TEIL II BILDER BEURTEILEN UND AUSWÄHLEN ... 109 Kapitel 4. Bilder bewusst beurteilen ... 110 4.1 ... Aspekte der Proportion ... 111 4.2 ... Der gerahmte Blick ... 111 4.3 ... Die Natur und die Mathematik ... 114 4.4 ... Der Modulor ... 115 4.5 ... Die Fibonacci-Reihe ... 115 4.6 ... Der villardsche Teilungskanon ... 117 4.7 ... Der Goldene Schnitt ... 117

Aktfotografie
Sie würden sich gerne an die Aktfotografie heranwagen, wissen aber nicht wie? In diesem Buch geben fünf Fotografinnen und Fotografen Einblicke in ihre Arbeit. Lernen Sie von den Profis, wie Sie Modelle finden, Aktshootings planen, Available Light und Blitzlicht nutzen und Aktfotos ästhetisch gestalten. Das Buch begleitet Sie auch dabei, Ihren eigenen Stil zu finden. Ob gefühlvolle Aktporträts, pure Körperformen oder sinnliche Aufnahmen: Lassen Sie sich von den unterschiedlichen Herangehensweisen inspirieren! Aus dem Inhalt: Natürliche Aktfotografie – den Menschen authentisch zeigenKlassische Aktfotografie – die pure KörperformDas Aktporträt – Gefühle und Emotionen ausdrückenSinnliche Dessous- und Aktfotografie – Lifestyle und ErotikInszenierte Aktfotografie – Geschichten erzählen und die Fantasie anregenDer Männerakt – Einsichten in die Arbeit von Bert Van PeltBildideen entwickelnShootings planen und durchführenKommunikation mit dem ModellAvailable Light und Blitzlicht einsetzenGestalten mit Licht, Farben und RequisitenBildbearbeitung und Schwarzweißkonvertierung Einführung ... 6 Interview: Aktmodell Sophie ... 9 1. Hannes Caspar: Natürliche Aktfotografie ... 14 Der Mensch im Fokus ... 14 Das Shooting ... 23 Das Posing ... 29 Licht in Innenräumen ... 34 Bildbearbeitung und Veröffentlichung ... 39 Shooting: Emma ... 42 Shooting: Johanna und Sophie ... 46 Shooting: Cynthia ... 50 Interview: Hannes Caspar ... 54 2. Sascha Hüttenhain: Klassische Aktfotografie ... 58 Die pure Form ... 58 Das Studioshooting ... 70 Licht im Studio ... 74 Die Fototechnik ... 82 Shooting: Der Leuchttisch ... 88 Shooting: Die Balletttänzerin ... 92 Shooting: Der Reifen ... 96 Interview: Sascha Hüttenhain ... 100 3. Anna Försterling: Gefühlvolle Aktfotografie ... 104 Gefühle sichtbar machen ... 104 Vom Porträt zum Akt ... 104 Das Shooting ... 110 Bild- und Lichtgestaltung ... 113 Analog fotografieren ... 124 Shooting: The second skin ... 130 Shooting: Different skins ... 134 Shooting: Two Souls ... 142 Interview: Anna Försterling ... 150 4. Sacha Leyendecker: Sinnliche Dessous- und Aktfotografie ... 156 Sinnlichkeit und Erotik ... 156 Light comes first ... 157 Farbkomposition ... 169 Bildgestaltung ... 174 Ideenfindung ... 184 Das Shooting ... 187 Bildauswahl und Bearbeitung ... 199 Social Media und Selbstvermarktung ... 201 Shooting: Muse ... 212 Shooting: Twinroom ... 220 Shooting: Blossoms and Stripes ... 226 Interview: Sacha Leyendecker ... 234 5. Inszenierte Aktfotografie ... 240 Geschichten erzählen ... 240 Ideenfindung ... 243 Konzept ... 245 Vorbereitung ... 248 Das Shooting ... 252 Bildbearbeitung und Schwarzweißkonvertierung ... 259 Visagie und Styling ... 270 Shooting: Snow and Ice ... 272 Shooting: Signs ... 278 Shooting: Secret Door ... 282 Interview: Andreas Bübl ... 288 Männerakt ... 292 Index ... 306
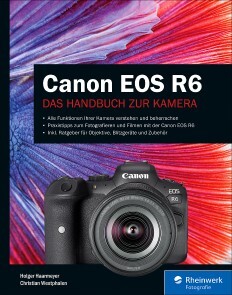
Canon EOS R6
Mit diesem Handbuch zur Canon EOS R6 tauchen Sie ein ins spiegellose Vollformat! Unsere Canon-Spezialisten Holger Haarmeyer und Christian Westphalen haben sich die EOS R6 ganz genau angeschaut und zeigen Ihnen, wie Sie ihre Möglichkeiten voll ausschöpfen: Vom intelligenten Autofokus über hohe ISO-Zahlen und Dual-Pixel-Technik bis hin zu 4k-Videoaufnahmen führen sie Sie Schritt für Schritt durch alle Funktionen und Menüs Ihrer Kamera. Dabei lernen Sie nicht nur Fototechniken kennen, wie etwa die richtige Belichtung, das perfekte Scharfstellen oder den gekonnten Blitzeinsatz, sondern erhalten auch so manchen Tipp aus der Praxis. Inkl. Ratgeber für Objektive, Blitzgeräte und Zubehör! Aus dem Inhalt: Die Canon EOS R6 konfigurierenAutofokus und SchärfeBelichtung und WeißabgleichFilmen mit der Canon EOS R6RF-Bajonett, Adapter und ObjektiveBlitze und weiteres ZubehörAlle Funktionen und Menüs Vorwort ... 11 1. Die Canon EOS R6 konfigurieren ... 12 1.1 ... Die wichtigsten Bedienelemente in der Übersicht ... 13 1.2 ... Beispielkonfiguration der Canon EOS R6 ... 15 2. Autofokus und Schärfe ... 22 2.1 ... Schärfe verstehen ... 22 2.2 ... Die Autofokustechnik ... 25 2.3 ... Mit dem Autofokus arbeiten ... 27 2.4 ... Weitere Konfigurationsmöglichkeiten des Autofokus ... 37 Fokus-Bracketing ... 46 2.5 ... Ursachen für Unschärfe und Autofokusprobleme ... 49 2.6 ... Motive manuell scharf stellen ... 53 Tipps für die Schärfeoptimierung ... 57 3. Belichtung ... 59 3.1 ... Grundlagen: Belichtung ... 59 3.2 ... Belichtungsmessverfahren ... 70 3.3 ... Die Belichtungsprogramme ... 74 3.4 ... Dateiformate ... 84 3.5 ... Weitere Optionen zur Anpassung der Belichtung ... 89 Einstellungen für Autofokus und Belichtung in der Praxis ... 106 3.6 ... Der Weißabgleich ... 108 3.7 ... Schwarzweißaufnahmen ... 114 4. Filmen mit der Canon EOS R6 ... 116 4.1 ... Videoaufnahmen mit der Kameraautomatik ... 116 4.2 ... Filmen mit manuellen Einstellungen ... 139 4.3 ... Nach der Aufnahme ... 161 5. Objektive und weiteres Zubehör für die Canon EOS R6 ... 168 5.1 ... Die RF-Objektive ... 170 5.2 ... Die EF-Objektive ... 172 5.3 ... Die Anforderungen der EOS R6 ... 175 5.4 ... Objektivgrundlagen ... 176 5.5 ... Das richtige Objektiv für jede Aufnahmesituation ... 191 5.6 ... Weiteres Zubehör ... 206 GPS mit der Canon EOS R6 nutzen ... 209 6. Blitzfotografie ... 211 6.1 ... Leitzahl ... 211 6.2 ... Das Funkblitzsystem in der Praxis ... 212 6.3 ... Speedlites im Überblick ... 228 6.4 ... Es blitzt nicht? ... 241 7. Alle Menüs und Einstellungen im Überblick ... 243 7.1 ... Einstellungsmöglichkeiten über das Menü ... 243 7.2 ... Aufnahmemenü SHOOT (rot) ... 244 7.3 ... Autofokusmenü AF (magenta) ... 282 7.4 ... Wiedergabemenü PLAY (blau) ... 282 7.5 ... Netzwerkmenü NETWORK (violett) ... 297 7.6 ... Einstellungsmenü SET UP (gelb) ... 299 7.7 ... Individualfunktionen C.Fn (orange) ... 314 7.8 ... My Menu (grün) ... 324 WLAN nutzen ... 328 Index ... 340

Dog Photography
Capture your four-legged friend's pure joy of living - in nature, in the studio, and in any season. In this book, Regine Heuser, dog photographer and shooting coach, shares smart hints and tricks that help you to capture your best friend in imposing pictures that have "that certain something". Learn everything there is to know about aperture, shutter speed, how to set the ISO value, and much more. You'll be surprised how fast you'll be able to handle the exposure settings manually, and consequently leave the automatic exposure and its programs in the dust. At the same time, the author delivers new inspirational photo concepts and encourages taking pictures even under difficult light conditions, finding suitable locations, and showcasing the dog in exciting ways - all for that one perfect moment! Contents: - Getting to work well-prepared - Finding a suitable location - A pinch of photo technology - Suitable metering modes - Emotional portraits of dogs - Puppy pics bring likes - ETTR or exposure to the right - White balance with JPEG and RAW - Skillful staging - Special lighting conditions - Mastering backlight situations - Photographing at eye level - Action: dogs in motion - Running phases and continuous shots - Telling stories through pictures - Funny pictures with treats in the studio - Posting pictures on social media Regine Heuser is one of the most famous dog photography coaches in Germany as well as an author. She works outdoors and in the studio and shows hobby photographers, from beginners to professionals, how to take the perfect picture of a dog using technical skills, a lot of patience, perfect timing, and, most of all, love for the animal. In addition, she photographs dogs owned by prominent figures for charity projects.

Photography with Tilt and Shift Lenses
Tilt and shift lenses offer tremendous creative possibilities for users of digital SLR and mirrorless cameras. This practical book explains the techniques that will help you take better photos - photos that don't distort or lose focus. Assessing the benefits and pitfalls of a range of lenses, adapters, software and editing techniques, it guides you through the practicalities of working with these lenses and gives you the skills to use them to best effect. With stunning examples throughout, this book gives an overview of the different lenses available, and tips on how adapters can give tilt/shift options when using old medium-format lenses. It gives advice on how simple lens shift can change the entire look of your photos, and techniques for using lens tilt for focus control and close-up working. Stunning examples show the use of tilt and shift lenses across a range of available focal lengths, both tripod-mounted and handheld.Keith Cooper is a professional architectural, interior and industrial photographer at Northlight Images in Leicester, UK. Keith also runs specialist training workshops for businesses and architectural practices seeking to improve their technical and creative photographic skills.
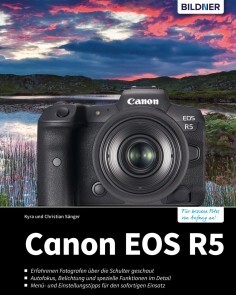
Canon EOS R5
Die EOS R5 ist der neue Profi-Allrounder von Canon und versetzt anspruchsvolle Fotografen wie auch ambitionierte Videofilmer in ganz neue technische Dimensionen. Sie bietet eine Vielzahl an sensationellen Optionen, deren komplexe Bedienung gelernt sein will. Entdecken Sie gemeinsam mit den Autoren, wie Sie das erstaunliche Potenzial dieser spiegellosen Premiumkamera in allen Paradedisziplinen bestmöglich einsetzen und das Maximum aus der EOS R5 herausholen! Systematisch lernen Sie die einzelnen Funktionen sowie Programme kennen und erfahren, mit welchen Einstellungen Sie zu perfekten Bild- und Filmergebnissen gelangen. Die Canon-Profis Kyra und Christian Sänger verraten dabei zahlreiche Tipps und Kniffe und zeigen anschaulich, wie Sie selbst die schwierigsten Situationen sicher meistern. Dieses praxisorientierte Buch richtet sich an alle, die ihre Canon EOS R5 von Grund auf beherrschen und kreativ einsetzen möchten. - Erfahrenen Fotografen über die Schulter geschaut- Autofokus, Belichtung und spezielle Funktionen im Detail- Menu- und Einstellungstipps für den sofortigen Einsatz Aus dem Inhalt:- Die EOS R5 kennenlernen- Fotos aufnehmen und betrachten- Automatische Motiverkennung einsetzen- Programmeinstellungen nutzen- Manuelles Belichten- Kreativ filmen leichtgemacht- Die Filmformate der EOS R5- Zeitraffer- und Zeitlupenvideos- Belichtung und Kontraste im Griff- Autofokussystem und manueller Fokus- Schnelle Bewegungen scharf einfangen- Natürliche Farblooks managen- Besser blitzen mit der EOS R5- Bildbearbeitung, WLAN und Weitergabe- Die Canon-Software im Überblick- Sinnvolle Objektive und ZubehörKyra und Christian Sänger sind professionelle Fotografen und erfahrene Fachbuchautoren. Sie haben bereits über 90 Bücher im Bereich Fotografie und Bildbearbeitung veröffentlicht. Wenn sie nicht gerade kommerzielle Projekte realisieren, sind sie privat mit der Kamera rund um den Globus unterwegs und fotografieren Natur und Tiere aller Art. Sie beschäftigen sich auch mit makrofotografischen Themen sowie künstlerischer Fotografie.

Canon EOS Rebel T8i/850D For Dummies
LEARN TO TAKE GORGEOUS PHOTOS WITH THIS BEGINNER-FRIENDLY GUIDE TO DSLR PHOTOGRAPHYThe Canon EOS Rebel T8i/850D dSLR camera has dozens of features that can help you take beautiful and striking photos. But if you’re new to photography, where do you begin? And is it possible to get up to speed quickly, without a lot of technical knowledge?Absolutely! In Canon EOS Rebel T8i/850D For Dummies, expert photography educator Julie King draws on her years of experience as she walks you through the ins and outs of photography and your Canon camera. Julie skips the technical jargon and gives you the info you need in plain language, guiding you through everything from shooting your first photos in auto mode to taking full control of your camera’s features.In the book you’ll:* Take the fast track to stunning stills with camera setup, picture settings, and Canon’s Auto Mode * Customize your picture taking experience by taking control of settings like exposure and focus * Access and organize your new picture library both on your camera and your computer Perfect for anyone who’s just received a Canon EOS Rebel and doesn’t know where to begin, this book will also earn a place in the libraries of more seasoned photographers who want to unlock everything this great camera has to offer.JULIE ADAIR KING is the bestselling author of many books about digital imaging, including For Dummies guides to Nikon, Canon, and Olympus digital cameras. When not writing, she teaches at various locations, including top photography schools such as the Palm Beach Photographic Centre. INTRODUCTION 1A Quick Look at What’s Ahead 2Icons and Other Stuff to Note 3Practice, Be Patient, and Have Fun! 3PART 1: FAST TRACK TO SUPER SNAPS 5CHAPTER 1: GETTING UP AND RUNNING 7Preparing the Camera for Initial Use 7Exploring External Camera Features 12Topside controls 12Back-of-the-body controls 14And the rest 20Changing from Guided to Standard Display Mode 22Ordering from Camera Menus 25Mastering menu basics 25Navigating Custom Functions 28Customizing the Touchscreen 29Viewing Camera Settings 31Displaying the Quick Control screen 32Decoding viewfinder data 33Switching to Live View Mode 35Customizing the Live View display 37Live View safety tips 40Using Quick Control Mode 40Familiarizing Yourself with the Lens 44Working with Memory Cards 47Reviewing Basic Setup Options 49Setup Menu 1 49Setup Menu 2 51Setup Menu 3 53Setup Menu 4 54Setup Menu 5 55A few other critical menu options before you go 56CHAPTER 2: CHOOSING BASIC PICTURE SETTINGS 59Choosing an Exposure Mode 60Basic Zone exposure modes 60Creative Zone modes (P, Tv, Av, and M) 61Changing the Drive Mode 62Understanding the Image Quality Setting 67Considering resolution: L, M, S1, or S2? 67Understanding file type (JPEG or Raw) 71Adjusting the Image Quality setting 76Setting the Photo Aspect Ratio 79Adding Flash 81Setting the flash to fire (or not) 85Adding Red-Eye Reduction 90Reviewing Advanced Flash Options 91Adjusting flash output with Flash Exposure Compensation 92Locking the flash exposure 94Investigating other flash options 96CHAPTER 3: TAKING GREAT PICTURES, AUTOMATICALLY 101Using Scene Intelligent Auto Mode 102Viewfinder shooting 102Live View photography in Scene Intelligent Auto mode 106Exploring Creative Assist Adjustments 110Discovering Selfie Mode 118Taking Advantage of SCN (Scene) Modes 121Accessing Scene modes 122Reviewing the available scene modes 124Adjusting camera settings in SCN mode 128PART 2: TAKING CREATIVE CONTROL 131CHAPTER 4: TAKING CHARGE OF EXPOSURE 133Introducing the Exposure Trio: Aperture, Shutter Speed, and ISO 134Aperture affects depth of field 136Shutter speed affects motion blur 137ISO affects image noise 139Doing the exposure balancing act 140Stepping Up to Advance Exposure Modes (P, Tv, Av, and M) 141Monitoring Exposure Settings 143Choosing an Exposure Metering Mode 146Setting ISO, Aperture, and Shutter Speed 149Controlling ISO 150Adjusting aperture and shutter speed 154Sorting Through Your Camera’s Exposure-Correction Tools 156Overriding autoexposure results with Exposure Compensation 156Improving high-contrast shots with Highlight Tone Priority 162Experimenting with Auto Lighting Optimizer 165Looking at a few other exposure solutions 169Locking Autoexposure Settings 172Bracketing Exposures Automatically 174CHAPTER 5: CONTROLLING FOCUS AND DEPTH OF FIELD 179Setting the Lens to Automatic or Manual Focusing Mode 180Discovering the AF ON button 182Exploring Viewfinder Focusing Options 183Adjusting autofocus performance 184Considering a few other autofocus settings 194Focusing in Live View and Movie Modes 196AF Method: Setting the focusing area 196AF Operation: One-Shot or Servo? 202Manual focusing in Live View and Movie modes 205Zooming in for a focus check 206Manipulating Depth of Field 208CHAPTER 6: MASTERING COLOR CONTROLS 213Understanding White Balance 214Changing the White Balance setting 215Creating a custom White Balance setting 220Fine-tuning color with White Balance Shift 222Bracketing White Balance 226Taking a Quick Look at Picture Styles 229Changing the Color Space 233CHAPTER 7: PUTTING IT ALL TOGETHER 235Recapping Basic Picture Settings 235Shooting Still Portraits 237Capturing Action 242Capturing Scenic Vistas 246Capturing Dynamic Close-Ups 249CHAPTER 8: SHOOTING AND VIEWING MOVIES 251Recording Movies Using Default Settings 252Setting the Broadcast Standard (NTSC or PAL) 256Understanding the Movie Recording Size Setting 257Selecting Audio Options 261Using Movie Digital Zoom 264Recording Vertical Movies 267Reviewing Other Movie Options 269Autofocusing options 270Movie Digital IS 271Playing with exposure and color 272Checking out a few final features 275Playing Movies 277PART 3: AFTER THE SHOT 281CHAPTER 9: PICTURE PLAYBACK 283Adjusting Instant Image Review 283Viewing Pictures in Playback Mode 284Viewing multiple thumbnails at a time (Index mode) 287Jumping through images 289Rotating still pictures 291Zooming in for a closer view 294Showing focus points during playback 295Viewing Picture Data 296Basic Information display mode 297Shooting Information display mode 299Understanding histograms 304Taking Advantage of Image Search 306CHAPTER 10: WORKING WITH PICTURE AND MOVIE FILES 311Deleting Files 312Protecting Photos and Movies 316Rating Photos and Movies 318Fixing Red-Eye 321Cropping Photos 322Processing Raw Images in the Camera 326Understanding the basic approach 327Using the Raw Image Processing tool 329Processing Raw images using Creative Assist 333Sending Pictures to the Computer 336Preparing Pictures for Online Sharing 340PART 4: THE PART OF TENS 343CHAPTER 11: TEN MORE CUSTOMIZATION OPTIONS 345Giving the Set Button an Extra Job 345Customizing Four Other Buttons 347Disabling the AF-Assist Beam 348Creating a Custom Menu 348Adding Custom Folders 349Turning Off the Shooting Settings Screen 350Embedding Copyright Notices 351Adding Cleaning Instructions to Images 353Stopping a Retractable Lens from Closing 353Swapping the AF Point Selection and AE Lock Button Functions 354CHAPTER 12: TEN FEATURES TO EXPLORE ON A RAINY DAY 357Shooting a Time-Lapse Movie 358Enabling Mirror Lockup 360Exploring a Few Obscure Printing Options 360Adding Special Effects to Photos 362Adding Effects During Shooting 364Creating Video Snapshots 366Trimming Movies 368Setting Up for Smooth HDTV Playback 369Presenting a Slide Show 370Viewing Photos and Movies on a TV 372Appendix: Exploring Wireless Connections 375Index 389

Inkscape (2. Auflage)
Die beliebte und kostenlose Alternative für die Arbeit mit Vektorgrafiken zur neuen Version Schritt für Schritt erklärt: Von der Installation und den richtigen Einstellungen bis hin zu fachmännischen Publikationen mit vielen praxisnahen Beispielen und kleinen Projekten zum Nachmachen. Inkscape ist der meistgenutzte Open-Source-Editor für Vektorgrafiken. Von der Inkscape-Gemeinschaft als freie Software entwickelt, lassen sich damit ebenso professionelle Grafiken erstellen wie mit kommerziellen Programmen. Sie können Ihrer Kreativität freien Lauf lassen und beispielsweise Visitenkarten, Logos oder Poster entwerfen. Dieses Handbuch führt Sie systematisch in die Software ein und erklärt alle wichtigen Funktionen. Sie lernen an praktischen Beispielen die umfangreichen Möglichkeiten und zahlreichen Werkzeuge von Inkscape kennen. Dabei hilft Ihnen der Autor mit zunächst einfachen Formen, das Prinzip hinter dem Programm zu verstehen, und führt Sie dann an die Arbeit mit Pfaden, Grafik- und Textobjekten heran. Wenn Sie die Grundlagen beherrschen, demonstriert Ihnen Winfried Seimert, wie Sie die gezeichneten Objekte durch Attribute anpassen und z.B. mit Farben, Füllmustern oder Transparenzen gestalten. Sie erfahren, wie Sie Objekte transformieren, klonen oder gruppieren können und lernen, auch kompliziertere Aufgaben zu meistern. So erhalten Sie – auch mithilfe der abschließenden Workshops – grundlegendes Wissen, das Sie zu weiteren Schritten und eigenständigem Arbeiten mit Inkscape bemächtigt.

Blitzfotografie
- Fundiertes Know-how mit anschaulichen Beispielen und Bildnern- "Blitzquickies": mit wenig Aufwand von der Idee zum Ergebnis- Herstellerübergreifend - kreative Inspirationen - praktische TippsSie möchten sich intensiver mit dem Thema Blitzen befassen, alle Funktionen Ihres Blitzgeräts begreifen oder kreative Impulse sammeln? In diesem Werkbuch zur Blitzfotografie finden Sie fachlich fundierte wie auch inspirierende Antworten. Fotograf und Dozent Michael Nagel führt Sie systemübergreifend in die praktische Anwendung der Blitztechnik ein. Viele Blitzquickie-Workshops laden Sie zum Nachmachen und Experimentieren ein und veranschaulichen die verschiedenen Schritte: Ausgangssituation, Aufnahmeskizze und -daten, Blitzeinstellungen sowie Bildbearbeitung. Benötigt wird nur eine kleine Auswahl an Zubehör und ein Blitzgerät. Profitieren Sie von den Ideen, Erfahrungen und hilfreichen Praxistipps des Autors und begleiten Sie ihn in die spannende Welt von Blitz und Licht!Aus dem Inhalt:- Licht und Stimmung- Zoomreflektor und Leitzahl- Die Crux mit dem Licht- Kürzer blitzen, als die Kamera erlaubt- Nikon CLS und Canon E-TTL II- Automatisch oder manuell blitzen?- Praktische Blitzfunktionen- Den passenden Blitz finden- Die wichtigsten Kameraeinstellungen- Hohe Kontraste in den Griff bekommen- Farbstiche und Filtereffekte- Licht messen und kontrollieren- Blitzen in P, A, S oder M- Entfesselt blitzen- Perfekt aufhellen- Nützliches Blitzzubehör- Großer und ausführlicher PraxisteilMichael Nagel ist als Trainer und Dozent im Foto+Medienforum Kiel tätig. Bei seinen Workshops und auf Reisen lernt er viele fotobegeisterte Menschen kennen und konnte so in über drei Jahrzehnten einen großen Erfahrungsschatz rund um das Thema Fotografie ansammeln. Sein direkter Draht zur Industrie und seine Kontakte in der Fotobranche versorgen ihn mit aktuellem Wissen, wovon v. a. die Leser seiner Kamerahandbücher profitieren. Sein Kernthema ist die Blitzfotografie; die Möglichkeiten des entfesselten Blitzens faszinieren ihn besonders.

Scott Kelbys Foto-Rezepte
Die besten Tipps und Tricks von Scott Kelby – aktualisiert & erweitert! Scott Kelby zeigt Ihnen, wie Sie als Einsteiger*in in die Digitalfotografie vom Start weg Bilder machen wie die Profis: scharf, korrekt belichtet und gut komponiert. Lernen Sie in 218 Schnellrezepten, wie Sie Ihre Kamera richtig bedienen und knifflige Aufnahmesituationen meistern, welches Zubehör Sie benötigen und was Sie bei der Nachbearbeitung Ihrer Bilder beachten sollten. Keine Theorie, nur Praxis pur – unterhaltsam präsentiert von einem der weltweit erfahrensten Trainer in der Fotografie! Sie lernen mit diesem Buch, wie Sie - wirklich scharfe Fotos machen - Landschaften packend fotografieren - Menschen einfühlsam porträtieren - mit schwierigen Lichtsituationen klarkommen - Ihre Urlaubsfotos Geschichten erzählen lassen - Ihre Hochzeitsfotos zu bleibenden Erinnerungen machen - mit Blitzlicht fotografieren - actiongeladene Sportfotos schießen - die Vorteile digitaler Fotografie richtig nutzen - aus Ihren digitalen Fotos brillante Drucke machen - und noch vieles andere mehr!
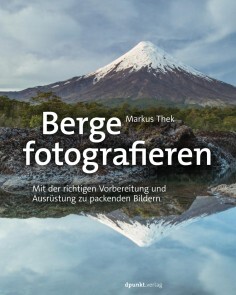
Berge fotografieren
Berge gekonnt fotografieren- Zeigt, welche kreativen Möglichkeiten Ihnen die Bergfotografie bietet.- Erläutert, was Sie über Kartenlesen und Wetter in den Bergen wissen müssen.- Enthält viel Praxiswissen zu nötiger Ausrüstung, richtiger Vorbereitung und Fitness.Bergfotografie boomt. Die Erhabenheit und Dramatik der Natur dort erlaubt beeindruckende Bilder. Aber: wenn Sie bei Wanderungen oder längeren Touren – oft im Ausland – gute Bilder machen wollen, müssen Sie sich Terrain und Motive im Vorfeld durch sorgfältige Planung erschließen (wie ist der Zugang, wie wird das Wetter, wie finde ich Route und Unterbringung, was muss in den Rucksack?). Wenn alles – Planung, Ausrüstung und körperliche Kondition – zusammenpasst, kommen die fotografischen Fragestellungen dazu: mit welchen Motiven kann ich rechnen, mit welchem Licht arbeiten, welche Kompositionsmöglichkeiten ergeben sich (etwa durch Spiegelungen in Bergseen)? Wie fotografiere ich nachts, wie bei schlechtem Wetter?Im Zuge von vier Beispieltouren zeigt Thek, wie das Gelernte in Fotoprojekten umgesetzt wird – am Beispiel von Patagonien, dem chilenischen Altiplano, den Alpen und Skandinavien.Markus Thek (https://www.markusthek.com/de/) ist engagierter Bergfotograf mit Wohnsitz in der Schweiz. Neben den Alpen besucht er regelmäßig die chilenischen Anden, wo er unter teils extremen Bedingungen fotografiert. Seine dort gemachten Bilder hat er bereits in einem eigenen Bildband ("Chile", Tecklenborg 2018) veröffentlicht. Markus Thek schreibt außerdem für Magazine und gibt Workshops zum Thema.

Digital SLR Photography All-in-One For Dummies
CLICK YOUR WAY TO STUNNING DIGITAL IMAGES WITH THIS THOROUGH RESOURCE!With the six mini-guides in Digital SLR Photography All-in-One For Dummies, you’ve got the six ingredients you need to cook up some fantastic photos. This book will help you make friends with your dSLR whether it’s the latest model or an older hand-me-down. Together, you’ll find the perfect angles, exposure, and lighting to capture magical images.It wouldn’t be digital photography without a bit of tech—SD cards, file transfers, resolution, and a few other things you might have never encountered before you picked up a dSLR. With this book, you can become a camera-wrangler extraordinaire, getting your shots and using digital editing tools to help them look their best. Now you have the tools you need to start building your portfolio—including some friendly advice on which images to include! Get out there and get shooting!* Explore your camera’s features and settings, then pick the perfect lenses for your photography style * Learn how to make beautiful images by controlling the key components of exposure -- aperture, shutter speed, and ISO settings * Light your shots perfectly with or without a flash or other lighting equipment * Use digital tools to make your photos shine and create an outstanding portfolio Upgrading to a digital SLR is a sign that you're serious about becoming a better photographer. Let this chummy Dummies guide, well, guide you as you become an image maker!ROBERT CORRELL has over two decades of experience in writing and photography. He is the author of all previous editions of Digital SLR Photography All-in-One For Dummies and has written several other books specific to individual DSLR camera models. INTRODUCTION 1About This Book 2Icons Used in This Book 2Where to Go from Here 3BOOK 1: PURSUING DIGITAL SLR PHOTOGRAPHY 5CHAPTER 1: EMBRACING DIGITAL SLRS 7Introducing the Digital SLR 7Naming and Classifying Digital SLRs 9Make and model 9Sensor size 11Pixel count 12Lens mount 13Mirror and viewfinder type 15Lenses 16Wrapping it up 16Pricing Digital SLRs 16Consumer dSLRs 17Mid-range models 18Professional cameras 18Delving into Camera Specifications 19Basic information 20Crop factor 20ISO 21Shutter speeds 21Autofocus system 22Movies 23Shooting modes and scenes 24In-camera processing 25Filters and other creative effects 25Media 26Viewfinder specs 26Image stabilization 27Following Recent dSLR Developments 29Shopping for a dSLR 31Understanding the system 31Going shopping 31Investing in accessories 33Embracing dSLRs 35CHAPTER 2: HANDLING, CLEANING, AND PROTECTING YOUR CAMERA 39Anatomy of a dSLR 39Front and center 40Around back 40Top and bottom 42Both sides 43Working the Controls 45Gripping the Camera 47Standard grip 47Vertical grip 48Over-the-shoulder grip 49Live View grip 49Providing Additional Support 50Handling an Articulated Monitor 52Using a Touchscreen 53Changing Batteries 54Checking battery power 54Inserting a battery 55Removing a battery 56Inserting and Removing Memory Cards 57Inserting a memory card 57Removing a memory card 58Cleaning Your Camera 59Wiping off the camera body 59Cleaning monitors and LCD panels 60Cleaning inside the camera 61Protecting Your Camera 63Using a camera strap 63Carrying a camera bag 64Buying extra lens and camera caps 64Armoring your camera 65Dealing with adverse weather 65CHAPTER 3: LEARNING ABOUT LENSES 69Identifying and Naming Lenses 69Brand name 71Lens mount 72Focal length 72Aperture 73Image stabilization 74Other identifiers 74Other lens characteristics 75Older lenses 76Categorizing Lenses 77Normal lenses 78Wide-angle lenses 78Telephoto lenses 79Prime lenses 80General-purpose zoom lenses 81Wide-angle zoom lenses 81Telephoto zoom lenses 82Specialty lenses 82Looking at Lens Anatomy 85Working with Lenses 88Getting a grip 88Mounting a lens 91Removing a lens 93Zooming in and out 94Switching from auto to manual focus 95Manually focusing 96Activating lens-based image stabilization 97Cleaning Lenses 98CHAPTER 4: EXPLORING MENUS AND CAMERA SETTINGS 101Understanding How Menus Are Organized 101Opening and Using the Menu 103Setting Up Your Camera 106Date and time 106Language 107Feature guides and expanded help 107Review time 107Auto power off 108Sound 108Touchscreen settings 108No card 109Setting Typical Shooting Options 109Image size and quality 109Using multiple memory cards 110ISO settings 111Picture control or creative style 111Color space 112Highlight and shadow options 112Noise reduction 113Aspect ratio 113Red-eye reduction 113Flash options 114Movie options 114Making Other Choices 114Display settings 114Display brightness and color 116Filenaming and numbering 116File and folder structure 117Auto Rotate (camera orientation) 117Copyright 117Wi-Fi connectivity 118Video mode or system 118Controlling Playback 118Protect Images 119Rotate 119Erase/Delete 119Print order 119Slide show 120Retouch 120Keeping Everything Running Smoothly 120Showing battery information 120Formatting memory cards 121Cleaning the image sensor 121Creating a dust reference photo 121Resetting the camera 122Updating the firmware 122Exploring Advanced Options 123Using custom functions and settings 124Creating custom shooting profiles 124Tweaking autofocus settings 124Configuring bracketing settings 125Customizing the controls 125Creating custom menus 126CHAPTER 5: TAKING PICTURES WITH YOUR DSLR 127Seeing the Big Picture 127Planning Ahead 128Unpacking and Readying Your Gear 129Setting Up Your Camera 131Performing an initial checkup 131Preparing for still photography 132Choosing a shooting mode 132Setting the image quality 144Choosing a viewing mode 144Configuring the display 146Setting exposure controls 146Setting other parameters 147Taking and Reviewing Photos 154BOOK 2: LOOKING THROUGH LENSES 161CHAPTER 1: APPRECIATING STANDARD ZOOM LENSES 163Embodying Versatility 163Taking Wide-Angle Shots 165Working with Normal Focal Lengths 168Zooming In 170Capturing telephoto shots 171Capturing portraits 172Capturing close-ups 173CHAPTER 2: ENJOYING WIDE-ANGLE LENSES 177Wide-Angle Whatzit 177Looking at Landscapes 179Capturing Wide-Angle Cityscapes 180Focusing on Single Buildings 182Photographing Interiors 184Shooting Wide-Angle Portraits 185Improving Your Wide-Angle Shots 186Frame tall objects from afar 186Get up close and personal 187Use the vertical 188Combine different elements into one shot 189Emphasize height 189CHAPTER 3: CAPTURING MACROS AND CLOSE-UPS 193Defining Macro and Close-up Photography 194Shooting at Close Ranges 195Managing Depth of Field 196Shooting Handheld with a Flash 197Maximizing Shutter Speed 198Shooting in Controlled Conditions 199Exploring Creative Alternatives 201Relaxing your angle of view 201Shooting close-ups with everyday lenses 202Using telephoto lenses 202Using Holga lenses 203Shooting with Special Accessories 204Using a teleconverter 205Using extension tubes 205Using diopters 207Using reverse rings 209Using a macro bellows 211CHAPTER 4: REACHING OUT WITH TELEPHOTO LENSES 213Learning the Lingo 213Using a Super Telephoto Lens 216Capturing Action with Telephoto Lenses 219Using Telephoto Lenses for Close-ups 221Capturing Portraits 223Photographing Animals 225CHAPTER 5: EXPLORING OTHER LENSES 229Fisheye Lenses 229Tilt-Shift Lenses 233Holga Lenses 236Lensbaby Lenses 239Pinhole Lenses 241Diana F+ Lenses 242BOOK 3: TAKING CREATIVE CONTROL245CHAPTER 1: MAKING SENSE OF EXPOSURE 247Understanding Exposure 247Evaluating exposure 248Controlling exposure 249Comparing exposure intervals 250Keeping an Eye on Exposure Information 252Reading the exposure level 252Viewing exposure settings 253Paying attention to warnings 255Measuring Light by Metering 255General metering methods 256Camera metering modes 256Changing metering modes 258Metering the scene with your camera 258Using an external light meter 259Reviewing and Analyzing Your Photos 260Delving into photo playback 260Interpreting histograms 262Troubleshooting Exposure 268Using exposure compensation 268Setting the exposure manually 269Using AE lock 271Autoexposure bracketing (AEB) 274Using other exposure tricks 275CHAPTER 2: SETTING THE APERTURE 277Investigating f-numbers and Apertures 277Learning about f-numbers 277Lenses and apertures 278Setting the Aperture 281From the camera 281From the lens 282Digging into Depth of Field 283Controlling the depth of field 283Previewing the depth of field 285Paying attention to the blurry parts 286Being realistic 287Designing with Depth of Field 288Landscapes 288Portraits 289Macros and close-ups 292Action 293Tilt-shift lenses 294CHAPTER 3: CHOOSING A SHUTTER SPEED 295Decoding Shutter Speed 295Learning about the shutter 296Reading the speed 298Shutter speed and exposure 300Setting the Shutter Speed 301Combating Blur and Noise 302Camera shake, rattle, and roll 302Shooting moving targets 307Enabling Long Exposure Noise Reduction 308Designing with Shutter Speed 308Shooting crisp photos 309Accounting for flash sync speed 311Photographing action 312Being creative with water 313Working with slow shutter speeds 315Using Bulb mode 316Shooting macros 316CHAPTER 4: SELECTING AN ISO 319Understanding ISO 319A bit of history 320Inside the numbers 321Generating noise with high ISOs 323The funny thing about noise 324Setting ISO 325Controlling ISO yourself 325Using Auto ISO 326Restricting Auto ISO 327Using High ISO Noise Reduction 328Managing ISO 329ISO Gallery 331Elevated ISO 331High ISO levels 332Extreme ISO settings 334CHAPTER 5: USING FILTERS 337Learning about Filters 337Looking at how filters work 337Considering filter pros and cons 339Using filters with dSLRs 341Taking Shape with Filter Systems 342Circular (screw-in) 343Rectangular frame slide-in 345Using Filters for Different Purposes 346Protective 346Circular polarizer 347Ultraviolet (UV) 348Neutral density (ND) 349ND graduated 351Color filter 351Color grad filter 352Other filters 352BOOK 4: LIGHTING THE SCENE355CHAPTER 1: WORKING WITH AMBIENT LIGHT 357Working in Natural Light 357Shooting during the morning golden hour 358Fighting with the light at noon 359Going out in the early evening 360Enjoying the evening golden hour 360Photographing the sunset 361Capturing twilight 362Shooting at night 363Dealing with Weather 364Capturing clouds 364Working in the snow 365Using fog 366Shooting Inside 367Photographing in large interior spaces 367Photographing in living spaces 368Using stage lighting 369Being Creative in Different Situations 370Working with indirect light 370Capturing reflections 370Dealing with glare and haze 371Shooting high-contrast scenes 372Photographing low contrast scenes 373The Shadow knows! 373CHAPTER 2: EXPLORING BASIC FLASH PHOTOGRAPHY 375Finding the Flash 376Using the Flash Automatically 377Setting a flash-friendly shooting mode 377Preventing the built-in flash from firing 378Customizing automatic flash settings 378Manually Activating the Built-in Flash 379Using the built-in flash 379Knowing when to use flash 381Disabling the built-in flash 384Tips on Using the Built-in Flash 384Getting Fancy with the Flash 386Enabling red-eye reduction 387Using flash compensation 388Using FE Lock 389Controlling the flash strength manually 389Unlocking more advanced features 390CHAPTER 3: USING AN EXTERNAL FLASH AND ACCESSORIES 393Getting to Know External Flash Units 393Looking at the front 395From the back and sides 397Accessorizing your external flash 399Handling an External Flash 402Attaching it to your camera 402Removing the flash 403Tilting and swiveling the flash head 404Attaching a mini stand 405Working the controls 405Configuring Your External Flash 407Trying Different Techniques 408Using high-speed sync 408Bouncing and diffusing 409Using an umbrella 410Focusing light with a snoot 411Using a stand 412Elevating the flash with a bracket 413Cords galore 413Going wireless 414BOOK 5: MANAGING AND PROCESSING YOUR SHOTS 417CHAPTER 1: TRANSFERRING AND MANAGING FILES 419Getting a Workflow 419Early Decisions 422Transferring Files 422Connecting 422Downloading 426Getting a Grip on Your Pictures 428Manual management 428Media-management software 429Processing and managing software 430Photo editors 433Managing Photos 434Quickly Processing the Good Ones 435Advanced Editing When Desired 436Publishing 436General considerations 436Resizing options 438Saving and exporting 439Archiving 440Playing it safe 441Putting the plan into action 442CHAPTER 2: QUICKLY SPRUCING UP SHOTS 445Software for Sprucing Up Photos 445Deciding on an Image Quality 446Benefits of Raw images 446Challenges of working with Raw photos 447Non-destructive editing 448Getting Started 448Reviewing and flagging good photos 448Switching to the Develop module 451Setting the lens profile 451Testing the waters 452etting Brightness and Contrast 453Adjusting the exposure 453Improving contrast 454Protecting highlights and shadows 455Setting the black and white points 456Working with texture, clarity, and haze 457Correcting and Improving Color 459Checking the white balance 459Adjusting color vibrancy and saturation 459Making Additional Improvements 461Finishing Up 463Straightening and cropping 463Exporting images 464Processing Photos In-Camera 464CHAPTER 3: DIGGING DEEPER INTO PHOTO EDITING 467Software for Editing Photos 468Dealing with the Mundane Stuff 468Creating a Photoshop file 468Helpful Photoshop features 470Coping with color management 471Saving your final images 472Dodging and Burning 472Using High Pass to Sharpen 474Making Minor Adjustments 476Applying Changes Selectively with Masks 477Mashing Up Versions of the Same Shot 478Stamping Out Imperfections and Distractions 480Dusting and cleaning 480Removing other distractions 482Improving complexions 482Adjusting Final Composition 484Words of Caution and Encouragement 486CHAPTER 4: EXPRESSING YOUR ARTISTRY 489Why Be Creative? 490Software for Your Artistic Endeavors 491Converting to Black and White 492Using black-and-white adjustment layers 493Photo gallery 495Colorizing Your Photos 498Tinting the fast and easy way 498Colorizing with Hue/Saturation 500Split toning using Color Balance 500Cross-processing with Curves 502Using color layers 503Creating duotones 506Experimenting with Artistic Filters 508Using the Filter Gallery 508Applying other filters 510Smart Filters 510Filter fun 511Using In-Camera Creative Styles and Filters 514Using in-camera styles 514Applying in-camera filters 516CHAPTER 5: CREATING PANORAMAS 519Shooting Pan-tastic Panoramas 519Getting your camera ready 520Shooting tripod-assisted panoramas 520Shooting handheld panoramas 522Stitching Photos Together 523Creating panoramas with Lightroom 523Creating panoramas with Photoshop 527Stepping Up Your Game 530Advanced blending in Photoshop 530Using a panoramic tripod head 531Using specialized panorama software 532Shooting HDR panoramas 533Shooting Automatic Panoramas 534CHAPTER 6: ENJOYING HDR PHOTOGRAPHY 537HDR Software 538Learning about HDR 538Shooting Exposure Brackets for HDR 540Configuring your camera 540Setting up automatic exposure bracketing (AEB) 541Shooting the exposure brackets 543Tone Mapping in Photomatix Pro 544Creating the HDR image 544Tone mapping the HDR image 548Trying Alternative Techniques 552Using your camera’s HDR modes 552Preparing your images differently 553Trying single-exposure HDR 554Creating your own brackets from a single shot 554Manually bracketing exposures 555Using other applications for HDR 555BOOK 6: SHOWCASING DIFFERENT SCENES 559CHAPTER 1: PORTRAITS 561Capturing Animal Portraits 561Copy What Works 563Snapping Casual Portraits 563Posing Group Photos 565Say Cheese! 566CHAPTER 2: LANDSCAPES 567Using an Ultra Wide-Angle Lens 567Getting Up Early 568Going Different Places 569Getting Out in the Weather 570The Classic Sunset 571CHAPTER 3: ACTION 573Tracking the Action 573Using an External Flash 574Finding the Right Spot 575Great Light is Great 576Pushing to the Limits 577CHAPTER 4: CLOSE-UPS 579Zoom In 579Be Ready to Grab Your Camera 580Using Diopters 581Whatever Works, Works 583Focus on Small Details 584Index 585

Landschaftsfotografie
- Vom Profi erklärt: Der einfache Weg zu einzigartigen Landschaftsaufnahmen- Know-how zu Fototechnik, Hard- und Software sowie BildbearbeitungEindrucksvolle Fotomotive findet man nicht nur in weiter Ferne. Auch die eigene Umgebung bietet wahre Schätze – und mithilfe dieses Buchs erlernen Sie, wie Sie Wiesen und Hügel, Flüsse und Seen, Wälder, Städte und Bauwerke in einzigartigen Aufnahmen festhalten können. Andreas Pacek erläutert Ihnen anhand seiner Bilder, wie Sie zu den verschiedenen Jahreszeiten geeignete Szenerien finden, Wetterstimmungen einfangen, die Lichtverhältnisse für sich nutzen, mit Farben und Linien spielen sowie durch unterschiedliche Einstellungen an Ihrer Kamera kreativ werden und damit ganz besondere Effekte erzielen.Erfahren Sie, wie Sie die Landschaft durch einen gezielten Bildaufbau mit Haupt- und Nebenmotiv sowie Vorder-, Mittel- und Hintergrund modellieren. Experimentieren Sie mit Schärfentiefe, Brennweiten sowie Langzeitbelichtung und verleihen Sie Ihrer Aufnahme somit einen individuellen Charakter. Der bekannte Fotograf lädt Sie dazu ein, ihm bei seiner Arbeit über die Schulter zu schauen und erklärt Ihnen anschaulich, was vor und vor allem hinter der Kamera passiert. Lassen Sie sich von den praktischen Tipps und Tricks sowie dem umfangreichen Know-how des Profis inspirieren und entwickeln Sie Ihren ganz persönlichen Stil. So können auch Sie stimmungsvolle Momente in Bildern einfangen!Aus dem Inhalt:- Auf der Suche nach Inspiration- Planung einer Fototour entsprechend der Jahreszeiten- Motivsuche vor der eigenen Haustür- Optimaler Bildaufbau – die Landschaft modellieren- Das Spiel mit Farben und Mustern- Umgang mit Brennweiten, Schärfe und Bewegung- Stimmung erzeugen bei Wind und Wetter- Licht ist alles! Aufnahmen zu unterschiedlichen Tageszeiten- Himmelskörper fotografieren: Sonne, Mond, Sterne und mehr- Stadt, Land, Fluss – unterschiedliche Umgebungen einfangen- Aufnahmen aus der Vogelperspektive mit Drohnen- Motive für Fotoausflüge in Deutschland- Fotospots in Großbritannien, Island und Norwegen- Besser fotografieren: Belichtung, Filter & Co.- Das Geheimnis perfekter LandschaftsbilderAndreas Pacek, geboren in Neuwied am Rhein, ist einer der bekanntesten deutschsprachigen Landschaftsfotografen. Bereits während seines Informatikstudiums sammelte er erste grafische Erfahrungen im Bereich Mediendesign und Bildbearbeitung. Er liebt das Spiel mit Wetterstimmungen und Licht. Die Ergebnisse seiner Fotoexkursionen zeigt er in Ausstellungen, Multivisionsshows, Bildbänden und Kalendern.

Panoramafotografie
- Vom Profi erklärt: Der einfache Weg zu einzigartigen Panoramaaufnahmen- Know-how zu Fototechnik, Hard- und Software sowie BildbearbeitungPanoramaaufnahmen gehören zu den Königsdisziplinen in der Fotografie. Sie bieten ein erweitertes Gesichtsfeld, begeistern mit ihrer realistischen Anmutung und sind bei gekonnter Erstellung einfach ein Genuss. In diesem Buch finden Sie nicht nur eine Vielzahl beeindruckender Panoramabilder, sondern auch gut nachvollziehbare Anleitungen, wie Ihnen selbst solche Fotos gelingen.Ulrich Dorn nimmt Sie an die Hand und zeigt Ihnen Schritt für Schritt, worauf es bei dieser Art der Fotografie ankommt. Lernen Sie die verschiedenen Panoramatypen sowie ihre Unterschiede kennen und erfahren Sie, was Sie bei der Erstellung von Panoramen grundlegend beachten müssen. Der Autor verrät, welche Ausrüstung und Objektive speziell für die Panoramafotografie empfehlenswert sind und erläutert das grundlegende Wissen rund um das Thema RAW. Und schon geht es auf die erste Expedition: Begleiten Sie den Profi bei seinem Panorama-Shooting in Venedig bei Nacht. Verschiedene Checklisten und Tipps helfen Ihnen dabei, das Gelernte selbst umzusetzen und unnötige Fehler zu vermeiden. Weiter geht es mit equirectangularen Little Planets, fantastischen HDR-Panoramen und weiteren spannenden Effekten, die zu ganz besonderen Aufnahmen führen. Lassen Sie sich von den faszinierenden Panoramafotografien in diesem Buch begeistern und inspirieren – und freuen Sie sich auf jede Menge Know-how, mit dem auch Sie zum Panoramaprofi werden!Aus dem Inhalt:- Verschiedene Panoramatypen im Visier- Notwendiges Equipment und Basiswissen- RAW entwickeln und schärfen- Was sind equirectangulare Panoramen?- Blaue Stunde und HDR-Panorama- Besondere Effekte mit ND-Filtern- Nachtpanoramen erstellen- Sphärische Panoramen aufnehmen- So gelingen Feuerwerkspanoramen- Software für die Panoramafotografie- Kunsteffekte mit Sketch- ... und viele weitere inspirierende TippsUlrich Dorn ist seit 2004 Freelancer und Autor. Zuvor war er viele Jahre erfolgreich für renommierte deutsche Verlage tätig. Er publiziert anregende Inhalte rund um den digitalen Lifestyle: Techniktrends, Internet und zeitgemäße Software sind die Themen, über die er schreibt und die ihn begeistern.Seine Schwerpunkte sind die Fotografie und das Post-Processing mit allen Facetten.

Pferde stilvoll fotografieren
- Den Blick für Rassen, Posen und ästhetische Bildgestaltung erlernen- Von der Shootingplanung über Fototechnik bis zur BildbearbeitungDas Glück dieser Erde ... es liegt nicht nur auf dem Rücken der Pferde, sondern mithilfe dieses Buchs auch bald in Form perfekter Pferdefotos in Ihren Händen. Wiebke Haas richtet sich an Einsteiger und fortgeschrittene Tierfotografen. Der Blick für das Detail und eine ästhetische Bildwirkung stehen dabei an oberster Stelle. Neben fototechnischem Wissen lehrt sie deshalb v. a. das harmonische Inszenieren verschiedener Pferderassen als Models – tiergerecht und clever geplant. Dabei legt die Autorin den Schwerpunkt auf eine anspruchsvolle, runde Bildgestaltung mit dem Aufbau von Vorder- und Hintergrund sowie perfektem Fotolicht. Erhalten Sie außerdem ganz persönliche Einblicke in Wiebkes Sichtweisen zur Pferdefotografie und deren Wandel in den letzten zehn Jahren.Aus dem Inhalt:- Optimales Equipment- Manuelle Pferdefotografie- Fotospots finden und inszenieren- Ein Shooting tiergerecht planen- Pferde als Motiv – vom Porträt bis zum Actionbild- Rassekunde: Pferdetypen erkennen und herausarbeiten- Die Kunst der Bildgestaltung- Licht zähmen – von Zauberlicht und mystischer Stimmung- Emotionen der Stille, der Freundschaft und der Wildheit- Beziehung von Pferd und Mensch- Eine Fotoserie umsetzen- Farblehre und Bildbearbeitung- Pferdefotografie im Haupt- und Nebenberuf 1991 an der Ostseeküste geboren und mit Tieren aufgewachsen, wurde Wiebke Haas nach ihrem Abitur staatlich geprüfte Berufsfotografin. Seitdem ist sie als Tierfotografin in der ganzen Welt tätig. 2013 arbeitete Wiebke bei Tim Flach, dem bekanntesten Fine-Art-Tierfotografen der Welt, in London. Ihre mehrfach international ausgezeichneten Bilder erscheinen in Zeitschriften, Magazinen, Kalendern sowie Galerien und im TV (u. a. BBC Global, NDR, BR). Außerdem veröffentlichte sie Fachbücher und einen Bildband. Mit ihrer Serie "Horsestyle" belegte sie Platz 3 bei den renommierten Sony World Photography Awards.

Affinity Photo 1.8 (2. Auflg.)
Praxiswissen für EinsteigerWinfried Seimert zeigt Ihnen, wie Sie Affinity Photo in der aktuellen Version 1.8 bestmöglich nutzen und eigene Fotos bearbeiten können. Der Schwerpunkt liegt dabei auf elementaren Arbeitsweisen, die im Alltag am häufigs-ten eingesetzt werden. Dabei geht der Autor Schritt für Schritt vor und erklärt die Funktionen anhand von leicht verständlichen Beispielen.Zuerst erfahren Sie, wie die Fotos Ihrer Kamera mit ein paar schnellen Klicks am Bildschirm optimieren können. Danach lernen Sie u.a., wie Sie Ihre Bilder freistellen, um nur bestimmte Bereiche zu bearbeiten, und wie Sie sinnvoll mit Ebenen arbeiten. Sie lernen Gradationskurven zu lesen und die Belichtung, den Kontrast und den Weißabgleich Ihrer Fotos zu verbessern. Außerdem demonstriert Winfried Seimert Ihnen, wie Sie trübe Himmel aufhübschen, unerwünschte Bildteile entfernen oder Fotomontagen vornehmen.Sie erhalten eine Fülle an grundlegendem Wissen, so dass Sie zukünftig problemlos selbstständig mit Affinity Photo arbeiten und Ihrer Kreativität freien Lauf lassen können.Aus dem Inhalt:Basiswissen: Benutzeroberfläche, Einstellungen und TastenkombinationenHilfslinien und Raster verwendenBildgröße anpassen und Bilder ausrichtenFarbanpassung vornehmen und Farbmodelle verstehenFreistellen und SeparierenArbeiten mit Ebenen: Zeichenobjekt-, Text-, Füllungs-, Maskierungs-, Anpassungs- und Live-FilterebenenSchnelle automatische sowie manuelle BildoptimierungSpezialeffekte und Filter einsetzen: Scharfzeichnen, Verzerren, Färben u.v.m.Fotomontagen, Bildretusche, Schönheitskorrekturen, Restaurieren und PanoramenÜber den Autor:Winfried Seimert ist IT-Dozent und Autor zahlreicher Fachbücher insbesondere zu den Themen Software und Betriebssysteme. Dabei hat er immer den Komfort des Anwenders im Blick und erklärt entsprechend praxisnah. So erfreuen sich seine Bücher aufgrund ihrer durchdachten Strukturierung bereits seit Mitte der neunziger Jahre großer Beliebtheit.
Photoshop Elements 2021 For Dummies
GET PICTURE-PERFECT RESULTS WITH PHOTOSHOP ELEMENTS 2021Photoshop Elements has a reputation for delivering the photo editing power that non-professional photographers and designers need to get eye-catching—and art-quality—results. This book offers guidance for applying everything from simple, one-click fixes all the way up to detailed retouching of your images.Photoshop Elements 2021 For Dummies assumes no prior photo-editing experience and makes it easy for even the absolute beginner to quickly grasp how to edit to create slick, professional-looking photos. In no time at all you’ll feel confident in everything from common image fixes to utilizing more creative techniques, such as using image layers to create a standout look. You’ll also find tips on building and managing complex photo projects.* Understand photo-editing concepts* Adjust clarity, color, and brightness* Add artistic touches* Catalog and organize your workThis fun and easy guide provides the steps you need to get the most out of this popular version of Photoshop—and will help you achieve truly beautiful results!BARBARA OBERMEIER is the principal of Obermeier Design as well as an adjunct professor at California Lutheran University. TED PADOVA is adjunct professor of visual arts and digital photography at Sillman University in Dumaguete, Philippines. Barbara and Ted are the authors or coauthors of more than 90 books. INTRODUCTION 1About This Book 1Icons Used in This Book 2Beyond the Book 3Where to Go from Here 3PART 1: GETTING STARTED WITH PHOTOSHOP ELEMENTS 2021 5CHAPTER 1: GETTING STARTED WITH IMAGE EDITING 7Getting Familiar with the Home Screen 7Launching the Photo Editor 9Making Basic Edits in Quick Mode 10Sharing a Photo 12Retracing Your Steps 14Using the History panel 14Reverting to the last save 15Getting a Helping Hand 15Saving Files with Purpose 17Using the Save/Save As dialog box 17Saving files for the web 19CHAPTER 2: BASIC IMAGE-EDITING CONCEPTS 21Grappling with the Ubiquitous Pixels 22Understanding resolution 22Understanding image dimensions 25The Art of Resampling 25Choosing a Resolution for Print or Onscreen 28Working with File Formats 28JPEG (*.jpg, *.jpeg, *.jpe) 28PNG (*.png) 30TIFF (*.tif, *.tiff) 30Getting Familiar with Color 31Getting Color Right 32Color the easy way 33Calibrating your monitor 33Choosing a color workspace 34Understanding how profiles work 35CHAPTER 3: EXPLORING THE PHOTO EDITOR 37Examining the Photo Editor 37Examining the image window 41Uncovering the contextual menus 45Selecting the tools 45Selecting from the Tool Options 48Playing with panels 48Using the Photo Bin 51Creating different views of an image 52Viewing filenames 52Using Photo Bin Actions 53Finding Your Bearings in Guided Mode 53Controlling the Editing Environment 55Launching and navigating Preferences 55Checking out all the Preferences panes 56PART 2: MANAGING MEDIA 61CHAPTER 4: NAVIGATING THE ORGANIZER 63Organizing Photos and Media on a Hard Drive 64Adding Images to the Organizer 65Adding files from folders and removable media 65Downloading camera images with the Elements Downloader 67Importing additional photos from folders 69Navigating the Media Browser 71Using a Scanner 72Understanding image requirements 72Using scanner plug-ins (Windows) 73Scanning on the Mac 75Scanning many photos at a time 75Phoning in Your Images 76Setting Organizer Preferences 78CHAPTER 5: ORGANIZING YOUR PICTURES 81Touring the Organizer 81Organizing Groups of Images with Tags 85Creating and viewing a tag 85Adding icons to tags 87Working with custom tags 88Working with default tags 90Working with sub-categories 90Sorting photos according to tags 91Auto Curating Images 92Working with Auto Creations 92Adding new Events 93Rating Images with Stars 93Adding Images to an Album 94Creating an album 94Using albums for temporary work 97Editing an album 97Finding out more about sharing your albums 98Adding People in the Media Browser 98Placing Pictures on Maps 100Working with Events 102CHAPTER 6: VIEWING AND FINDING YOUR IMAGES 105Cataloging Files 105Using the Catalog Manager 106Working with catalogs 107Backing up your catalog 108Backing up photos and files 109Switching to a Different View 110Viewing Photos in Memories (Slideshow) 111Searching for Photos 113Using Search 113Searching for untagged items 115Searching captions and notes 115Searching by history 116Searching metadata 116Searching similarities 118Grouping Files That Get in the Way 119Marking files as hidden 119Stackin’ ’em up 120Creating versions 121PART 3: SELECTING AND CORRECTING PHOTOS 123CHAPTER 7: EDITING CAMERA RAW IMAGES 125Launching the Camera Raw Editor 126Understanding Camera Raw 127Learning Raw file format attributes 128Opening images in the Camera Raw Editor 129Getting Familiar with the Raw Editor 130Getting Familiar with the Panels 133Using the Basic panel 134Sharpening and reducing noise 137Using the Calibration panel 139Working with Filmstrips 140Synchronizing edits 141Synchronizing defaults 143Working with Profiles 143Looking at the Adobe Camera Raw profiles 144Managing profiles 145Creating a Favorites list 146Opening Non-Raw Images in the Camera Raw Editor 146Changing Image Defaults 147Working with XML Files and Preferences 147Changing program defaults 148Using Save Options 149Using sidecar files 149CHAPTER 8: MAKING AND MODIFYING SELECTIONS 151Defining Selections 151Creating Rectangular and Elliptical Selections 152Perfecting squares and circles with Shift and Alt (Option on the Mac) 154Applying Marquee options 154Making Freeform Selections with the Lasso Tools 156Selecting with the Lasso tool 157Getting straight with the Polygonal Lasso tool 159Snapping with the Magnetic Lasso tool 159Working Wizardry with the Magic Wand 162Talking about Tolerance 162Wielding the Wand to select 163Modifying Your Selections 165Adding to, subtracting from, and intersecting a selection 165Avoiding key collisions 166Painting with the Selection Brush 167Painting with the Quick Selection Tool 169Selecting with the Auto Selection Tool 171Selecting Your Subject 172Fine-Tuning with the Refine Selection Brush 174Working with the Cookie Cutter Tool 176Eliminating with the Eraser Tools 178The Eraser tool 178The Background Eraser tool 179The Magic Eraser tool 180Using the Select Menu 181Selecting all or nothing 181Reselecting a selection 181Inversing a selection 181Feathering a selection 182Refining the edges of a selection 182Using the Modify commands 184Applying the Grow and Similar commands 184Saving and loading selections 185CHAPTER 9: WORKING WITH LAYERS 187Getting to Know Layers 187Converting a background to a layer 188Anatomy of the Layers panel 189Using the Layer and Select menus 192Working with Different Layer Types 194Image layers 194Adjustment layers 195Fill layers 197Shape layers 198Type layers 199Tackling Layer Basics 199Creating a new layer from scratch 199Using Layer via Copy and Layer via Cut 201Duplicating layers 201Dragging and dropping layers 202Using the Paste into Selection command 202Moving a Layer’s Content 203Transforming Layers 204Adding Layer Masks 205Flattening and Merging Layers 208Flattening layers 208Merging layers 209CHAPTER 10: SIMPLE IMAGE MAKEOVERS 211Cropping and Straightening Images 211Cutting away with the Crop tool 212Fixing distortion with the Perspective Crop tool 214Cropping with a selection border 216Straightening images 216Recomposing Images 217Employing One-Step Auto Fixes 219Auto Smart Fix 220Auto Smart Tone 221Auto Levels 222Auto Contrast 223Auto Haze Removal 223Auto Color Correction 223Auto Shake Reduction 224Auto Sharpen 224Auto Red Eye Fix 225Editing in Quick Mode 227Fixing Small Imperfections with Tools 230Cloning with the Clone Stamp tool 231Retouching with the Healing Brush 233Zeroing in with the Spot Healing Brush 235Repositioning with the Content-Aware Move tool 237Lightening and darkening with Dodge and Burn tools 239Smudging away rough spots 240Softening with the Blur tool 242Focusing with the Sharpen tool 242Sponging color on and off 244Replacing one color with another 245CHAPTER 11: CORRECTING CONTRAST, COLOR, AND CLARITY 249Editing Your Photos Using a Logical Workflow 250Adjusting Lighting 251Fixing lighting with Shadows/Highlights 251Using Brightness/Contrast 252Pinpointing proper contrast with Levels 253Adjusting Color 255Removing color casts automatically 256Adjusting with Hue/Saturation 257Eliminating color with Remove Color 258Switching colors with Replace Color 259Correcting with Color Curves 262Adjusting skin tones 262Defringing layers 264Eliminating haze 266Adjusting color temperature with photo filters 267Mapping your colors 268Adjusting Clarity 269Removing noise, artifacts, dust, and scratches 270Blurring when you need to 271Sharpening for better focus 274Opening closed eyes 276Colorizing a photo 278Smoothing skin 279Adjusting facial features 280Reducing shake 281Moving Photos 282Working Intelligently with the Smart Brush Tools 284PART 4: EXPLORING YOUR INNER ARTIST 287CHAPTER 12: PLAYING WITH FILTERS, EFFECTS, STYLES, AND MORE 289Having Fun with Filters 289Applying filters 290Corrective or destructive filters 291One-step or multistep filters 291Fading a filter 292Selectively applying a filter 292Working in the Filter Gallery 293Distorting with the Liquify filter 295Correcting Camera Distortion 297Exploring Elements’ Unique Filters 298Creating a comic 299Getting graphic 300Using the Pen and Ink filter 301Dressing Up with Photo and Text Effects 302Adding Shadows, Glows, and More 304Applying styles 305Working with styles 306Using the Graphics panel 307Mixing It Up with Blend Modes 308General blend modes 309Darken blend modes 309Lighten blend modes 311Lighting blend modes 312Inverter blend modes 314HSL blend modes 314Using Photomerge 315Photomerge Panorama 316Photomerge Group Shot 318Photomerge Scene Cleaner 320Photomerge Exposure 321Photomerge Compose 323CHAPTER 13: DRAWING AND PAINTING 327Choosing Color 327Working with the Color Picker 328Dipping into the Color Swatches panel 329Sampling with the Eyedropper tool 331Getting Artsy with the Pencil and Brush Tools 332Drawing with the Pencil tool 332Painting with the Brush tool 334Using the Impressionist Brush 336Creating your own brush 337Filling and Outlining Selections 339Fill ’er up 339Outlining with the Stroke command 341Splashing on Color with the Paint Bucket Tool 342Working with Multicolored Gradients 343Applying a preset gradient 343Customizing gradients 345Working with Patterns 348Applying a preset pattern 348Creating a new pattern 349Creating Shapes of All Sorts 350Drawing a shape 350Drawing multiple shapes 352Specifying Geometry options 352Editing shapes 354CHAPTER 14: WORKING WITH TYPE 355Understanding Type Basics 355Tools 356Modes 356Formats 357Creating Point Type 358Creating Paragraph Type 359Creating Path Type 360Using the Text On Selection tool 360Using the Text On Shape tool 361Using the Text On Custom Path tool 363Specifying Type Options 364Editing Text 366Simplifying Type 367Masking with Type 368Stylizing and Warping Type 371Adjusting type opacity 371Applying filters to your type 372Painting your type with color and gradients 372Warping your type 374PART 5: PRINTING, CREATING, AND SHARING 375CHAPTER 15: GETTING IT ON PAPER 377Getting Pictures Ready for Printing 378Working with Color Printer Profiles 379Printing a photo with the printer managing color 381Printing a photo with Elements managing color 383Printing a picture package or contact sheet 384Getting Familiar with the Print Dialog Box 384Using the Prints options 384Creating transfers and more with More Options 386CHAPTER 16: SHARING YOUR WORK 389Getting Familiar with the Elements Sharing Options 389Planning ahead 390Understanding photo sharing in Elements 391Using the Share Panel 392Emailing photos 393Working with Adobe Premiere Elements 394Sharing your photos on social networks 395CHAPTER 17: MAKING CREATIONS 399Checking Out the Create Panel 399Grasping Creation-Assembly Basics 400Creating a Quote Graphic 404Creating a Memories Video 407Creating a PDF Slideshow 408Making Additional Creations 408PART 6: THE PART OF TENS 409CHAPTER 18: THE TEN BEST GUIDED EDITS 411Correct Skin Tone 411Sharpen 413Object Removal 414Perfect Portrait 416Replace Background 418Remove a Color Cast 421Levels 422Resize Your Photo 424Recompose 425Move & Scale Object 427CHAPTER 19: TEN (OR SO) MORE PROJECT IDEAS 431Screen Savers 431Flyers, Ads, and Online Auctions 432Clothes, Hats, and More 434Posters 435Household and Business Inventories 435Project Documentation 436School Reports and Projects 436Blogs 436Wait — There’s More 436Index 437

Sächsische Schweiz
Die Bastei mit der Felsenburg Neurathen, der Pfaffenstein mit der Barbarine, der Gohrisch, das Bielatal, oder die Festung Königstein – die Sächsische Schweiz strotzt vor landschaftlichen und touristischen Highlights.Spektakuläre Aussichten, tiefe Schluchten und monolithischeFelsen reihen sich aneinander und bieten dem Besucher besondere Wander- und Ausflugsziele. Philipp Zieger setzt diese Naturkunstwerke emotional in Szene. Er folgt dabei der Richtung des bei Touristen beliebten Malerwegs und zeigt die bizarren Felslandschaften und Schluchten im Elbsandsteingebirge, die wildromantischen Landschaften zwischen Bastei und Kleiner Winterberg oder den stimmungsvollen Blick vom Großen Bärenstein. Ein Muss für jeden Naturliebhaber und Fotobegeisterten!Philipp Zieger gehört zu den jungen bemerkenswertenLandschaftsfotografen Deutschlands. DerNaturliebhaber und Fotograf hat seinen regionalenSchwerpunkt vor seiner Haustür gefunden: Auf seinenzahlreichen Fototouren hält er die malerische Landschaftder Sächsischen Schweiz in faszinierenden Bildern fest.Seine Fotos wurden mehrfach ausgezeichnet und in Magazinen, Büchern sowie Kalendern veröffentlicht. Sein Talent, Landschaften emotional in Szene zu setzen und damit die Stimmung eines Moments zu vermitteln, haben Philipp Zieger innerhalb kurzer Zeit bekannt gemacht.

Mecklenburg-Vorpommern
Die bizarren Kreidefelsen auf Rügen, das Vogelparadies entlang der Ostseeküste der Vorpommerschen Boddenlandschaft oder das Revier der Seeadler in den endlosen Wald- und Seenlandschaften der MecklenburgischenSeenplatte: Kaum ein Landstrich in Zentraleuropa bietetso abwechslungsreiche Natur wie Mecklenburg-Vorpommern. Mit drei Nationalparks ist das Bundesland Spitzenreiter in Sachen Schutzgebiete.Die einmalige Tier- und Pflanzenwelt zieht jedes Jahr unzähligeNaturliebhaber, Ruhesuchende und natürlich auch Fotobegeisterte an. Timm Allrich und Mario Müller bündeln in ihrem Bildband einzigartige und faszinierende Tier- und Landschaftsaufnahmen aus dem bei Touristen beliebtesten Bundesland. Perfekt zum Staunen, Erinnern undVerschenken!Mario Müller (oben) und Timm Allrich (unten) gehören zu denbesten Tier- und Landschaftsfotografen Deutschlands.Timm Allrich ist erfahrener Fototrainer, Ratgeberautor und offizieller ZEISS-Markenbotschafter. Mario Müller ist Natur- und Reisefotograf, Fototrainer, Buchautor, Regionalgruppenleiter der Gesellschaft für Naturfotografie sowie Seeadler-Landeskoordinator in Mecklenburg- Vorpommern. Durch ihre Fotos, Workshops und Publikationen begeistern die Autoren unzählige Menschen für die Fotografie und die Schönheit der Natur. Mit ihrem Bildband liefern sie einen lebendigen und emotionalen Einblick in die NationalparksMecklenburg-Vorpommerns.

Pfälzerwald fotografieren
DER FOTO-REISEFÜHRER ZUR ABWECHSLUNGSREICHSTEN LANDSCHAFT DEUTSCHLANDS * sechs Touren zu den fotografischen Highlights und Geheimtipps des Pfälzerwalds * QR-Codes mit Google Maps-Links erlauben genau Tour-Planung * mit Exkursen zu Grau- und Grauverlaufsfiltern, Wetter, Nachthimmel und Waldfotografie Schluchten, Berge, Klippen, Wasserläufe, NebelmePfälzerwald eine Vielfalt an Motiven, die in Deutschland ihresgleichen suchtere und Heidelandschaften - Fotograf*innen finden im . In diesem Fotoscout zeigen Ihnen die beiden Pfälzer Landschaftsfotografen Raik Krotofil und Michael Lauer, wo und wann Sie diese am besten fotografieren. In sechs detailliert beschriebenen Touren führen die beiden Sie zu bekannten und weniger bekannten Locations. QR-Codes, die auf Google Maps verlinken, lassen Sie dabei schnell und sicher zu Ihren Zielen navigieren. Angaben zu den benötigten Brennweiten, den besten Tages- und Jahreszeiten sowie wertvolles Wissen über Wetterlagen und -entwicklung erlauben Ihnen eine genau Planung Ihres Fototrips. Zudem helfen Ihnen die Autoren, Ihre fotografischen Fertigkeiten auszubauen: In vier ausführlichen Exkursen lernen Sie, Langzeitbelichtungen zu machen, mit Grau- und Grauverlaufsfiltern zu arbeiten, Landschaft und Nachthimmel sowie Wälder stimmungsvoll zu fotografieren.